Dynamic Document Creator
The exceptional process to create documents manually, automatically, or on a schedule.
We have designed this application in the ServiceNow workspace to be all inclusive. No external dependencies, no 3rd party script libraries.
It's ALL ServiceNow on the ServiceNow platform. It's all from ideas from a team of developers who wanted to make the document creation process streamlined.
Current Application Version: 1.2.31
Released on December 11, 2024.
¡ Security !
Due to requirements put in place for security by ServiceNow, We are required to put some restrictions on the application.
OUR TEAM IS HAPPY TO COMPLY WITH ALL SECURITY MEASURES AS THIS IS SAFER FOR YOUR DATA AND YOUR SYSTEM.
Ex.
ONLY an 'admin' role user is able to edit the script field. Even though there is a scoped admin role, it cannot edit the script fields.
We were not able to add cross scope permissions to OOB tables, so we cannot create Business Rules, Scheduled Jobs or UI Actions for you. This will require you to create those records and attach them to the Document Record. Likewise, we cannot delete those Business Rules, Scheduled Jobs or UI Actions.
We do use 'GlideRecordSecure', so when creating documents, whomever is creating them must have access to all of the data trying to be captured for the document.
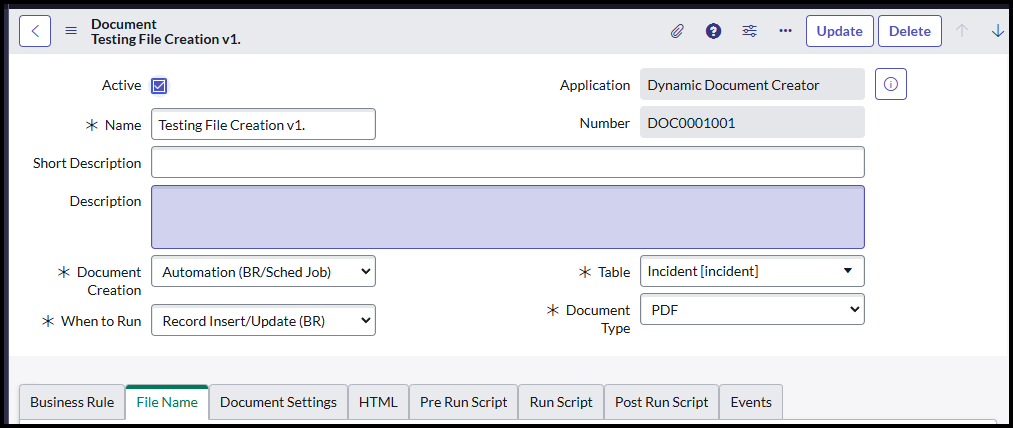
Main Document Form
Here you will control how your document will be formed, what it will be named, the type of document to create, what you will do before, during and after creation of the file.
Designed for a quick setup, you could be creating files within minutes.
This form is best viewed in "Tabbed" format otherwise it can be pretty long!
Populate a few fields, change a few settings, set your design and you'll be creating documents.

FILE TYPES
- Attach a PDF Fillable Document
- Use HTML and script to quickly design your document
- Completely script the entire look of your document
- CSV
- Can be used with Scheduled Jobs
- Get 10 lines or 10k+ lines.
- TXT
- For simple basic text files.
- HTML
- With everything online now, a very popular file type to create.
- RICH TEXT
- Is not a .docx file, but can be opened in word.
- Use HTML and script to easily create a non-PDF .docx like file.
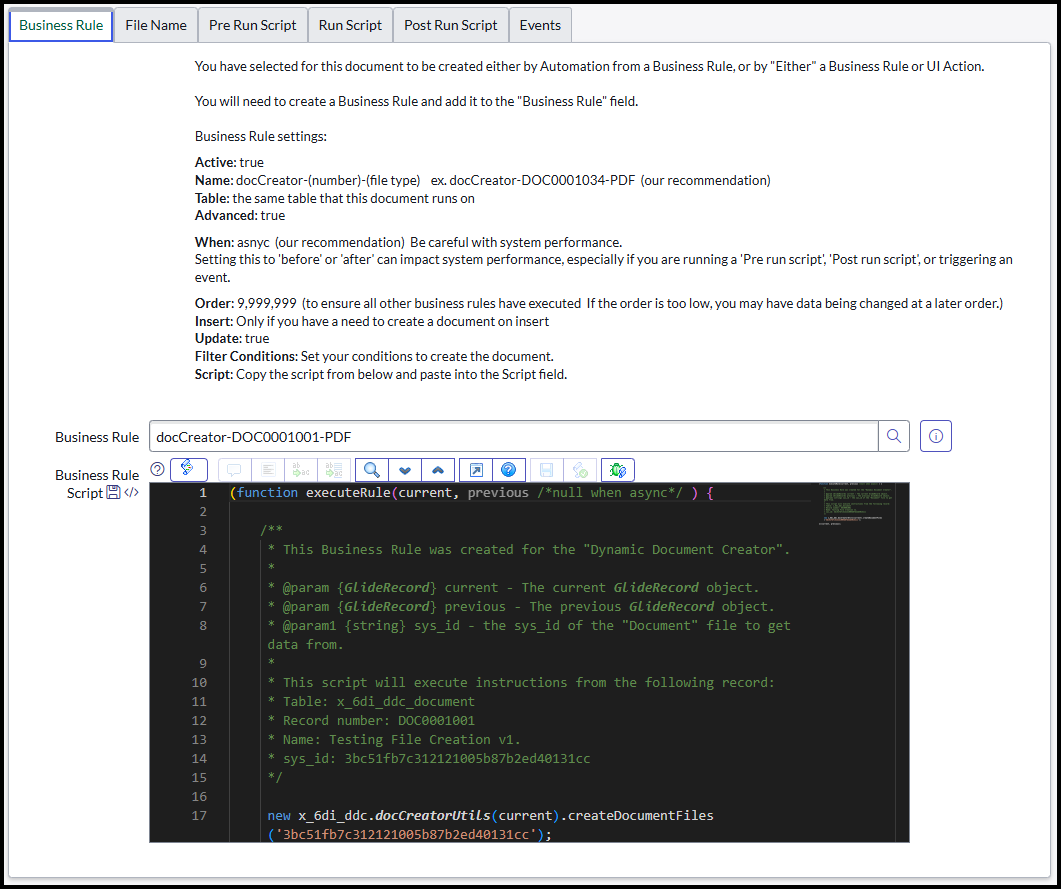
Business Rule / Scheduled Job / UI Action
This you will create based on your needs. You cannot have a Business Rule and Scheduled Job for the same document. If you do, only 1 will work, and that is what the Document record is set to.
You can have a Business Rule and UI action together.
Once you save your record for the first time, a tab will appear for either a Business Rule, Scheduled Job, or UI Action. Each section will have a reference field for the record you create.
We do provide the script that you will need to copy/paste into the associated record you create. We also provide guidance for other fields that need to be set on the associated record.
File Name
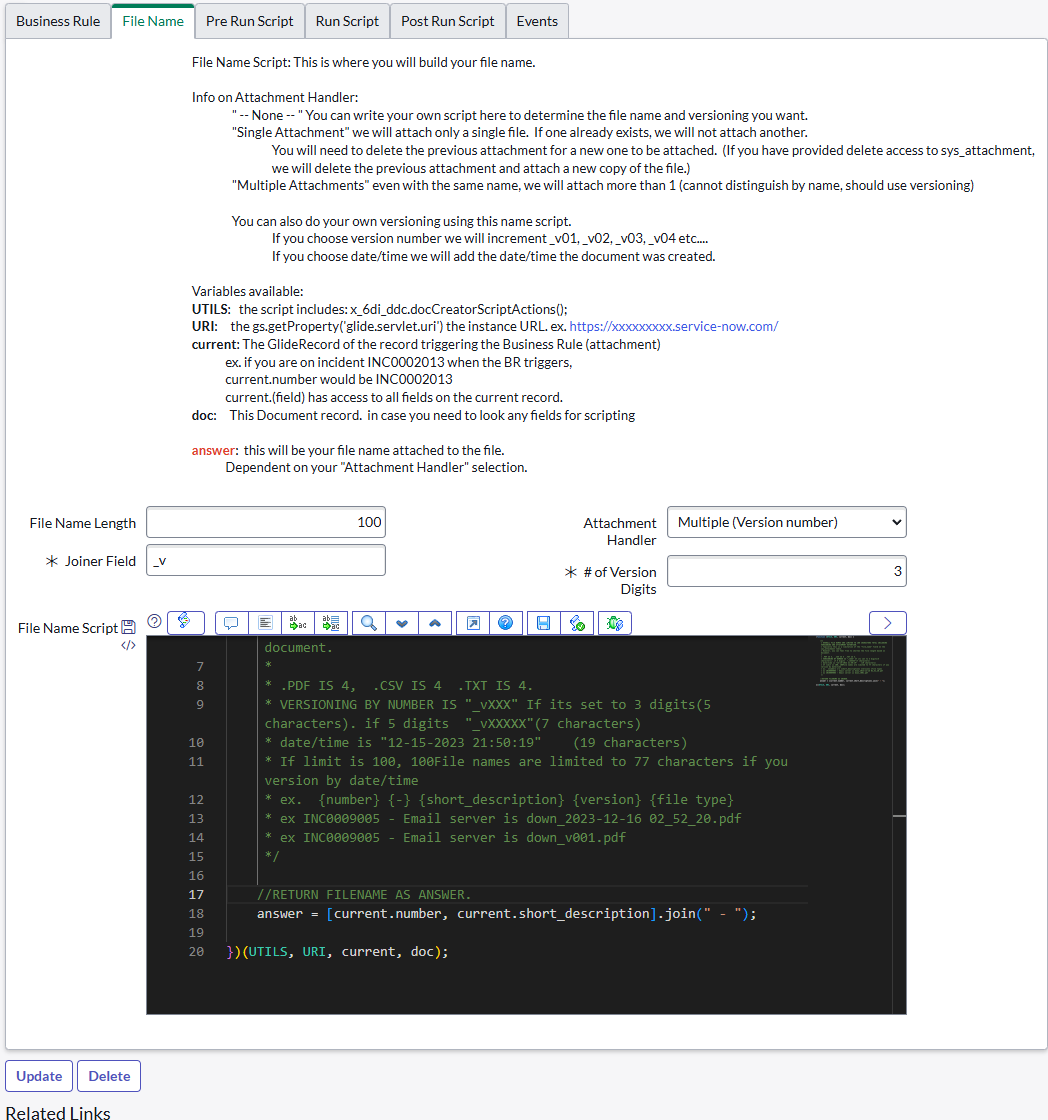
Here, you can script your file name to whatever you want it to be. You have access to the "current" record that the document will be created on.
ex.
Creating a document on an incident form. We give you an example of current.number + current.short_description.
You can change the maximum length of the file name, however it cannot be longer than the "file_name" field on the sys_attachment table.
We give you multiple ways of "versioning" your file name. The most popular is the Multiple Version Numbers: "_v003", "_v004".
We even allow you to change how many digits your versioning is: "_v1", "_v01", "_v00001". However long your versioning is, will detract how long the file name can be.
However you can use other versioning such as date, time, date/time or alphabetical character. And the best part, is that it's a script field, so you can create your own filename and version if desired.
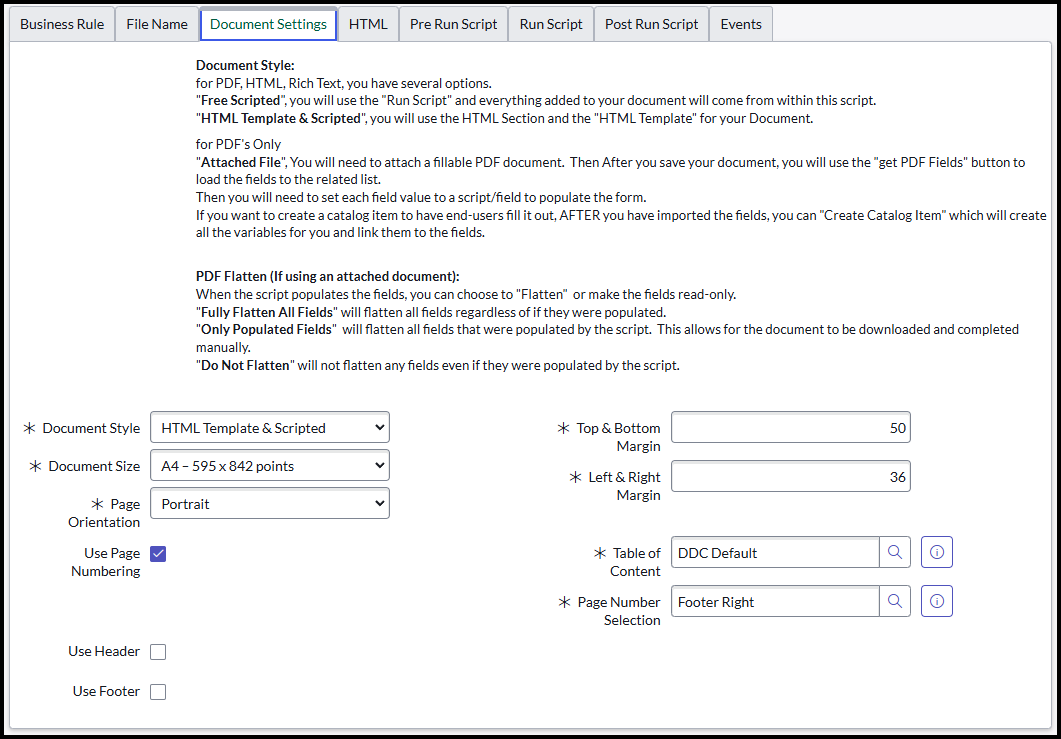
Document Settings
Under this tab, you'll find more settings to make your document unique.
This section will be different based on the document type you are trying to create and what properties apply to the document.
PDF's, the most commonly created document, change the size, orientation and margins. Decide to use page numbering and the location of the numbers, as well as using a header and/or footer.
This is also where you set how you will create the document.
HTML Template & Scripted: Here you will use the HTML editor and scripts to design your document.
Free Scripted: This will require you to completely customize your document via the "Run Script" field. You will need to script all headers, spacing, and formatting. Most common HTML code is accepted.
Attached File: Here, you will attach a single file to the document record. This will need to be a Fillable PDF document. Once attached, there is a UI action to retrieve the fields from the attached file.
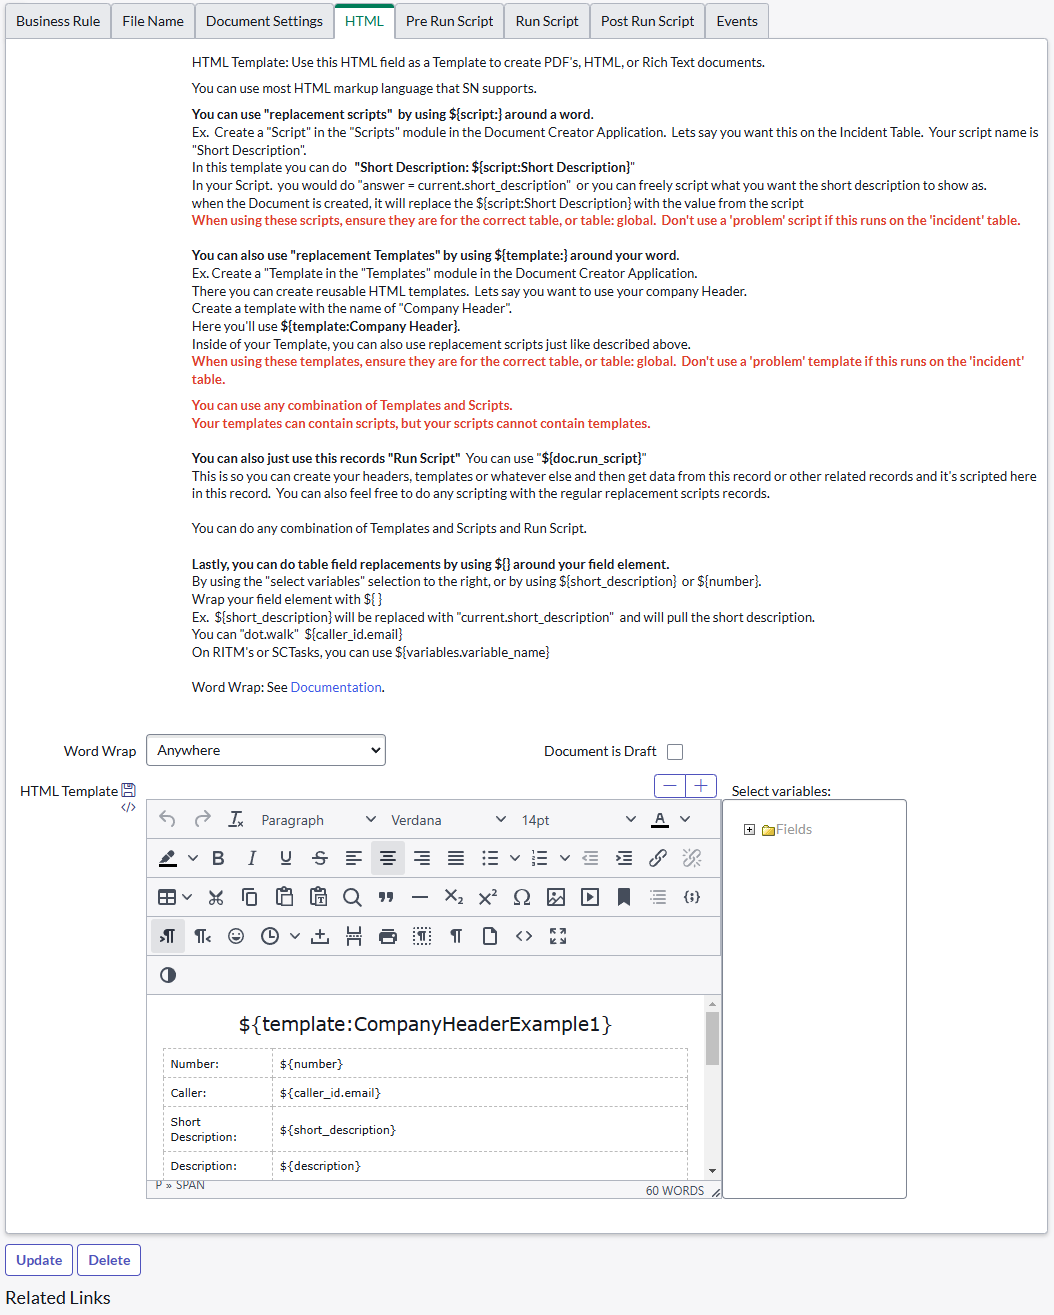
HTML
In this section you can use a WYSIWYG (What You See Is What You Get) editor.
You can use templates, scripts, the run script, and field level replacements. You call them by inserting
${template:template_name} this template is on the "x_6di_ddc_template" table. These templates CAN contain other ${script:script_name} calls.
${script:script_name}, will run a script from table "x_6di_ddc_script", but CANNOT contain any ${template} calls.
${doc.run_script} can be inserted anywhere in the template and will perform the actions within the "Run Script" tab.
${field} can be inserted where it will get the field value for the selected field.
Each of the above will only run if the table is "global" or on the table in which you are trying to create the document.
So it will not work creating a document on the "incident" table and calling a script on the "sc_task" table.
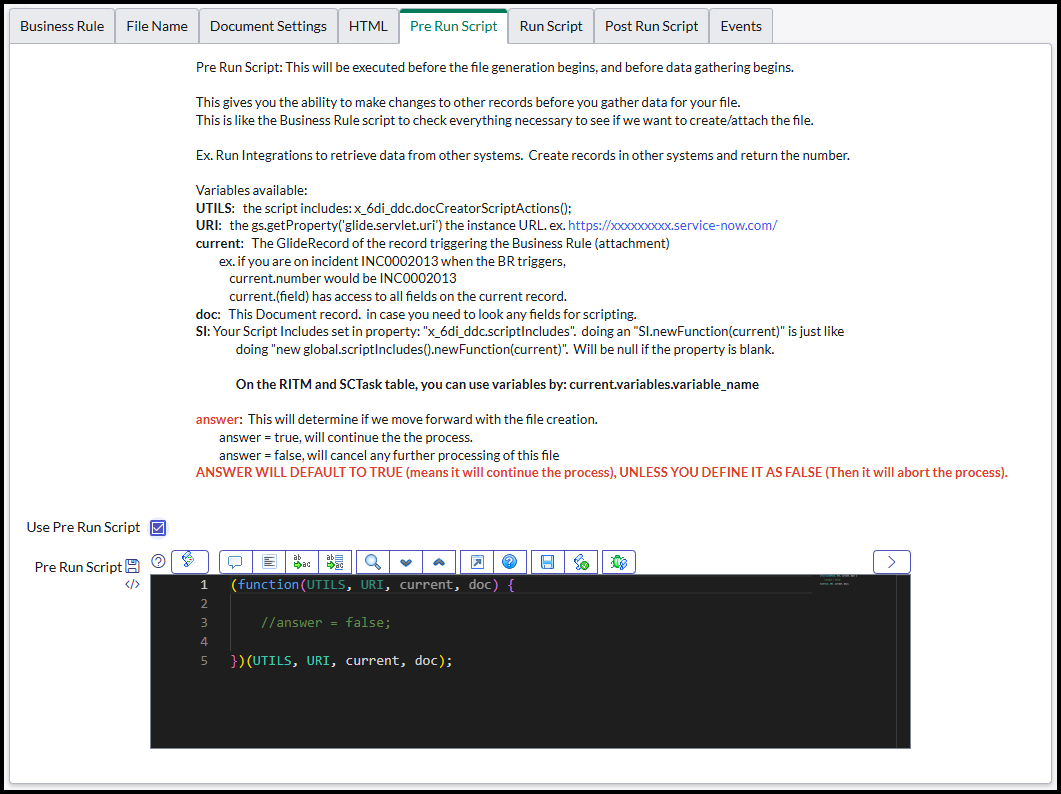
Pre-Run Script
Use this script as a sort of condition checker. You can run integrations to collect data and update the record before creating the document.
Make sure your integration has completed.
Gather data from other records and update the current record.
Delete data or delete another attachment.
During your checks, If you don't like something, "answer = false" will prevent the document from being created.
"answer = true" or nothing, it will default to create the document. You can also uncheck the Use Pre Run Script to not evaluate this script at all.
Run Script
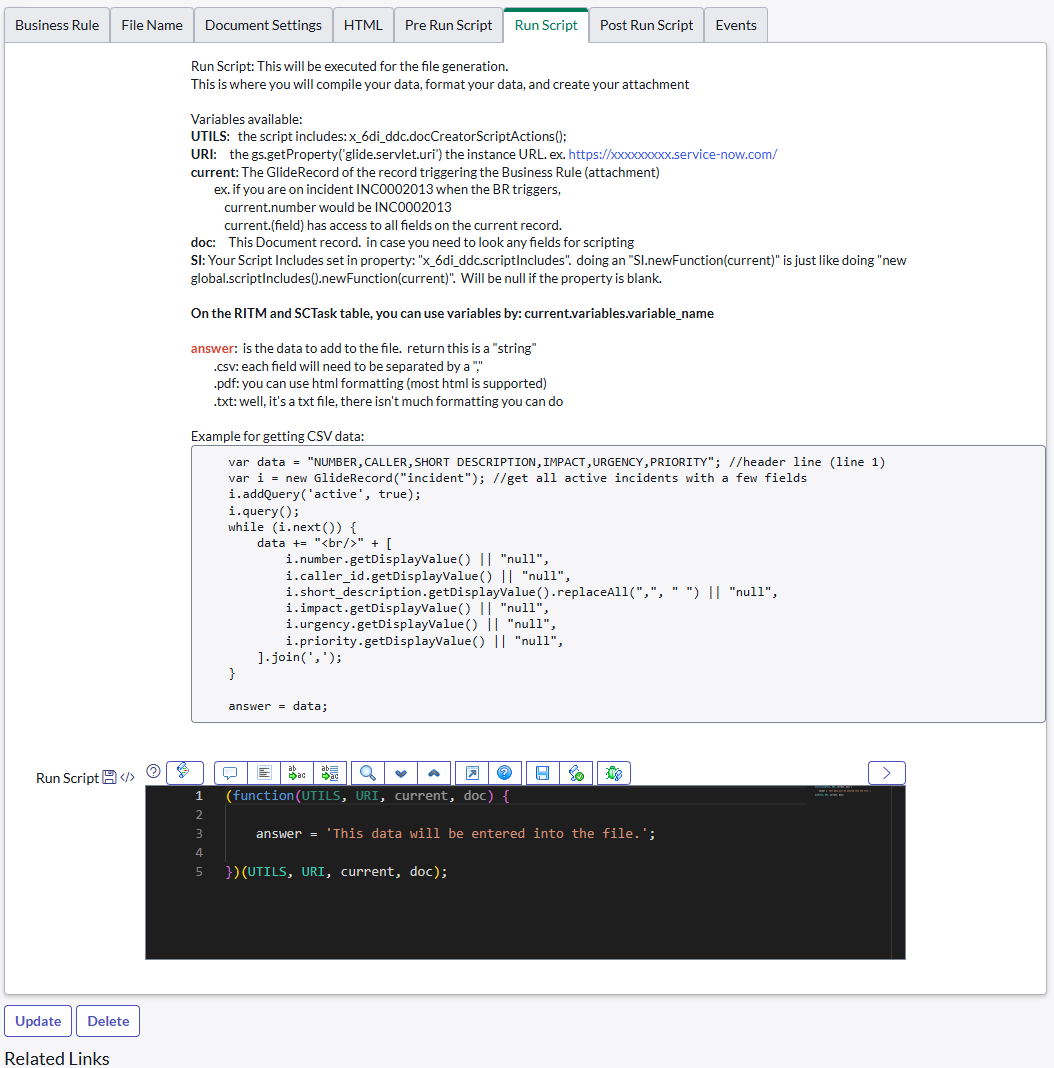
This is where you'll get your data that is entered into the newly created document.
Needs to be returned as a string.
For HTML documents (PDF, HTML, RICH TEXT) line breaks are <br />.
For non html, line breaks are \n.
MOST HTML formatting is accepted. When creating PDF's not all HTML is honored, so it may require some detail testing while generating your documents.
If using HTML and Script document type, this data will be entered into the document at ${doc.run_script} place.
If not using HTML, this script is what puts the data into the file (except the PDF attached document, then it's whatever field you map to the document run script)
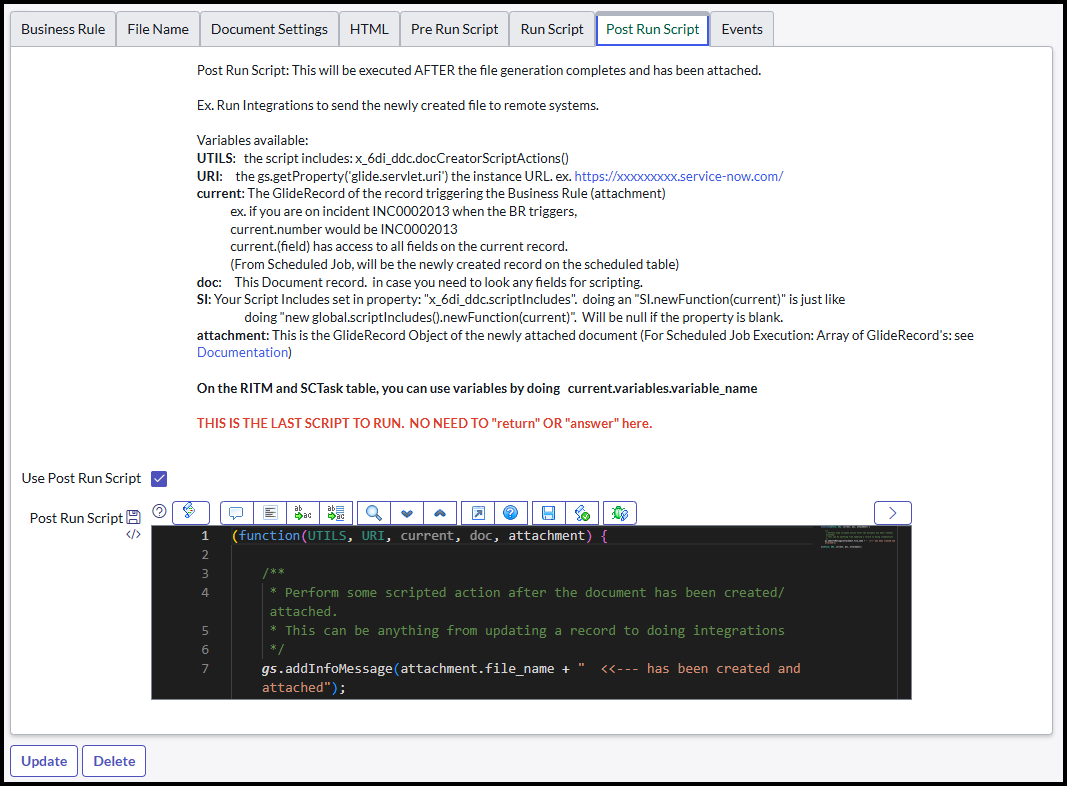
Post Run Script
This script is run After the document has been created and attached to the destination record.
You have access to the attachment as "attachment" in the script. (if run as a Business Rule or UI Action)
If run as a Scheduled Job, you have access to ALL attachments through "attachment" in the Script.
while (attachment.next()) {
gs.info("Attachment File Name: " + attachment.file_name);
}
If you Zip the files, You will have access to all files created Plus the zip that contains all the newly created files.
If you Zip the files and delete the originals, you will only have access to a single zip file in the post run script. Still needs to be accessed via the while loop.
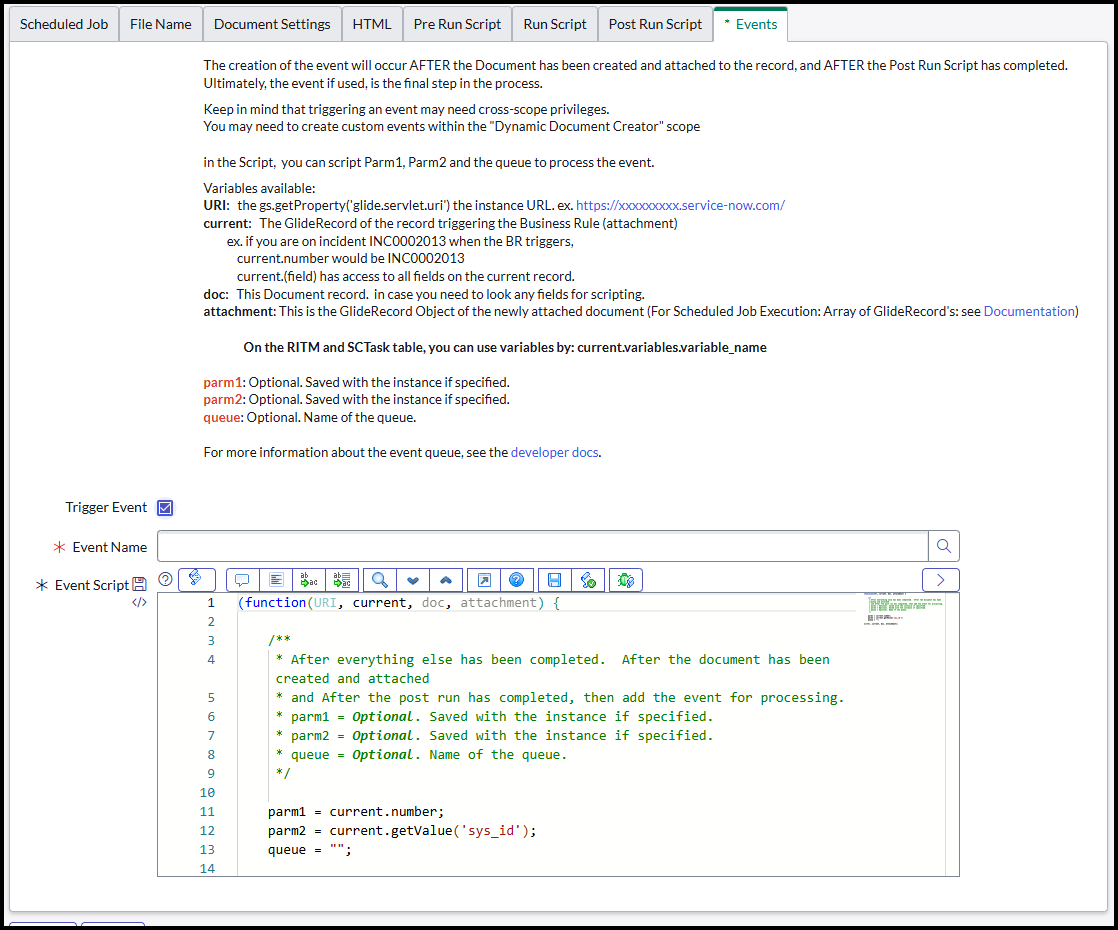
Events
Lastly, after the Document has been created and attached and after the post run script has been completed, then if you so choose to do so, you can trigger an event.
You may already have an event doing an event 'Script Action' script, or maybe you have an event triggering an email. Either way, you can trigger an event here.
All you need to do is set the event name and what you want parm1 and parm2 to be.
**Warning** You may have to deal with cross scope permissions when firing an event. Check logs for details.
Please Support Us
We are a small business and could use any donation you are willing to provide!
We thank you!


